Design & Testing
Robot Framework
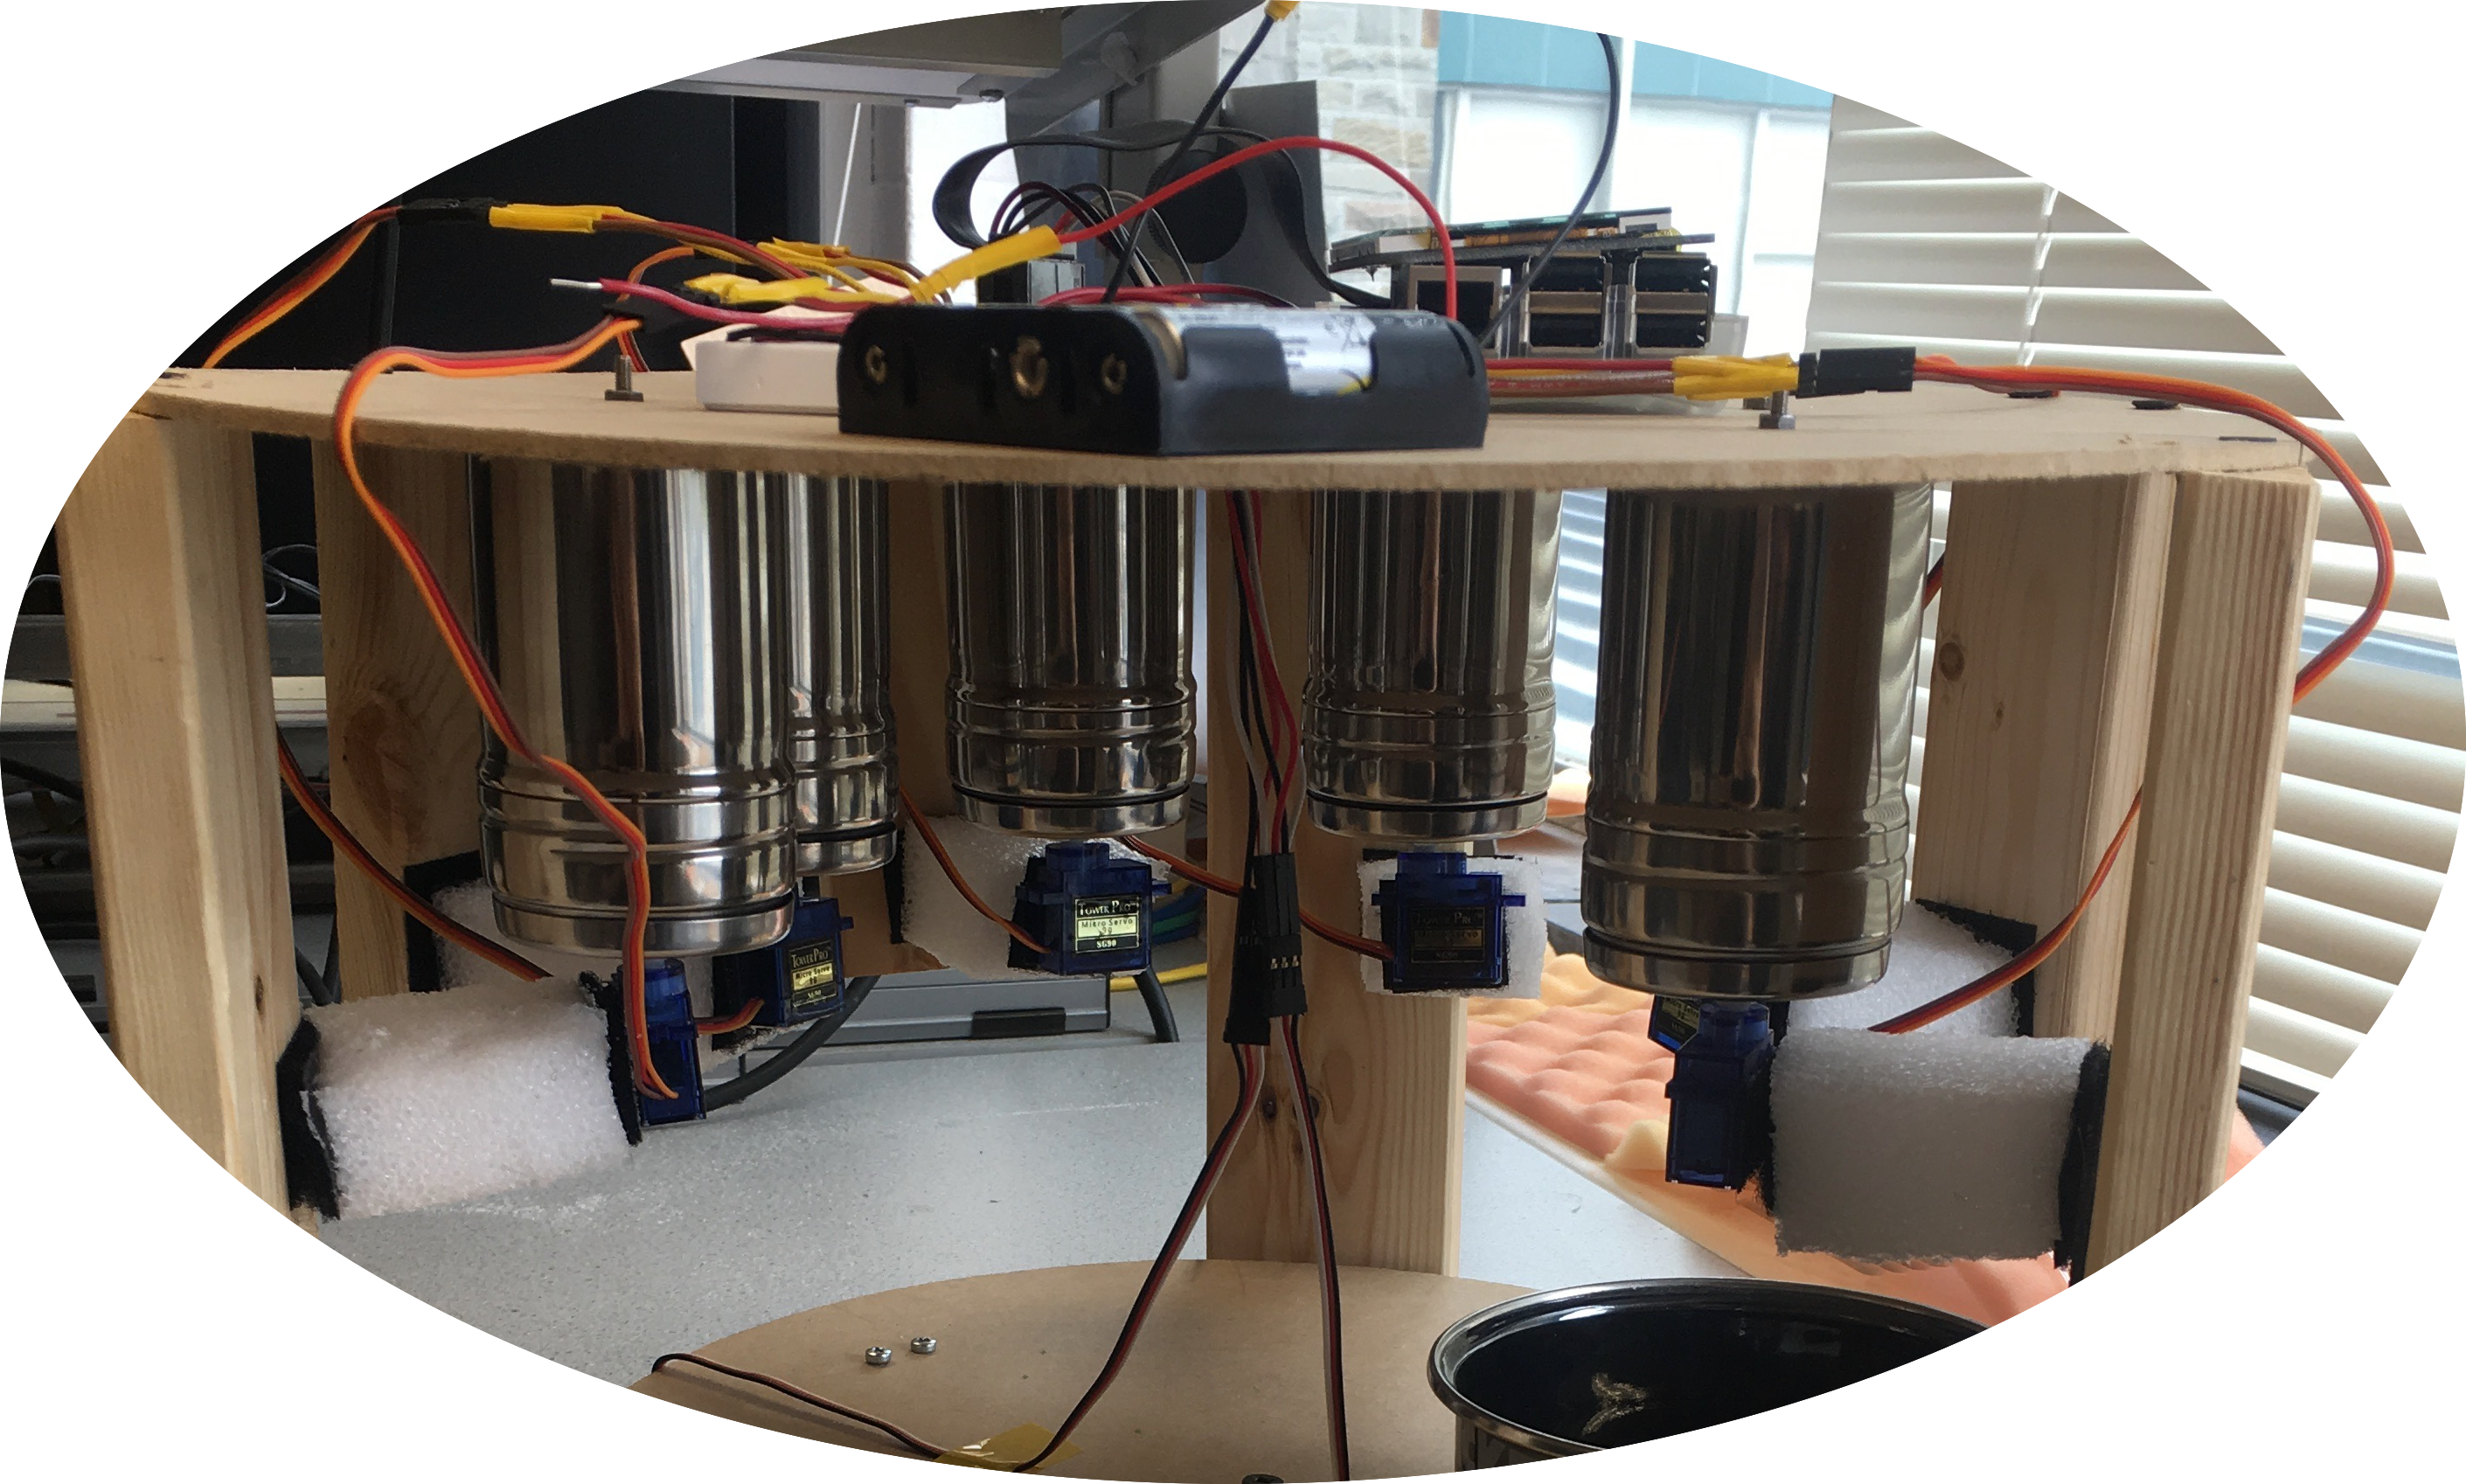
DetailsDesign: Robot framework refers to the supporting structure of our robot; it involves a top plate, 6 shaker cans attached to the top plate, 3 legs attached to the top and bottom plates, a bowl holder plate with wheels, and a bottom plate. The three plates are made of panel boards, and the three legs are made of furring strips.
 |
|---|
Testing:
To test the robustness of the framework, we focused on the reliability of the bowl holder plate rotation. We first took out the bowl holder plate and tested its rotation. We then inserted the bottom plate back into the overall framework to test if it is able to work properly.
1. One of the idle wheels was not touching the ground
2. The bottom plate of the framework is not flat enough to allow constant smooth rotation.
We fixed the first problem by loosening the problematic wheel. And for the second problem, we wrapped rubber bands around the two driving continuous servos, such that there is more friction and less instability when the plate is climbing uphill (very small slope due to the unevenness of the bottom plate).
Shaker Can Cover Rotation
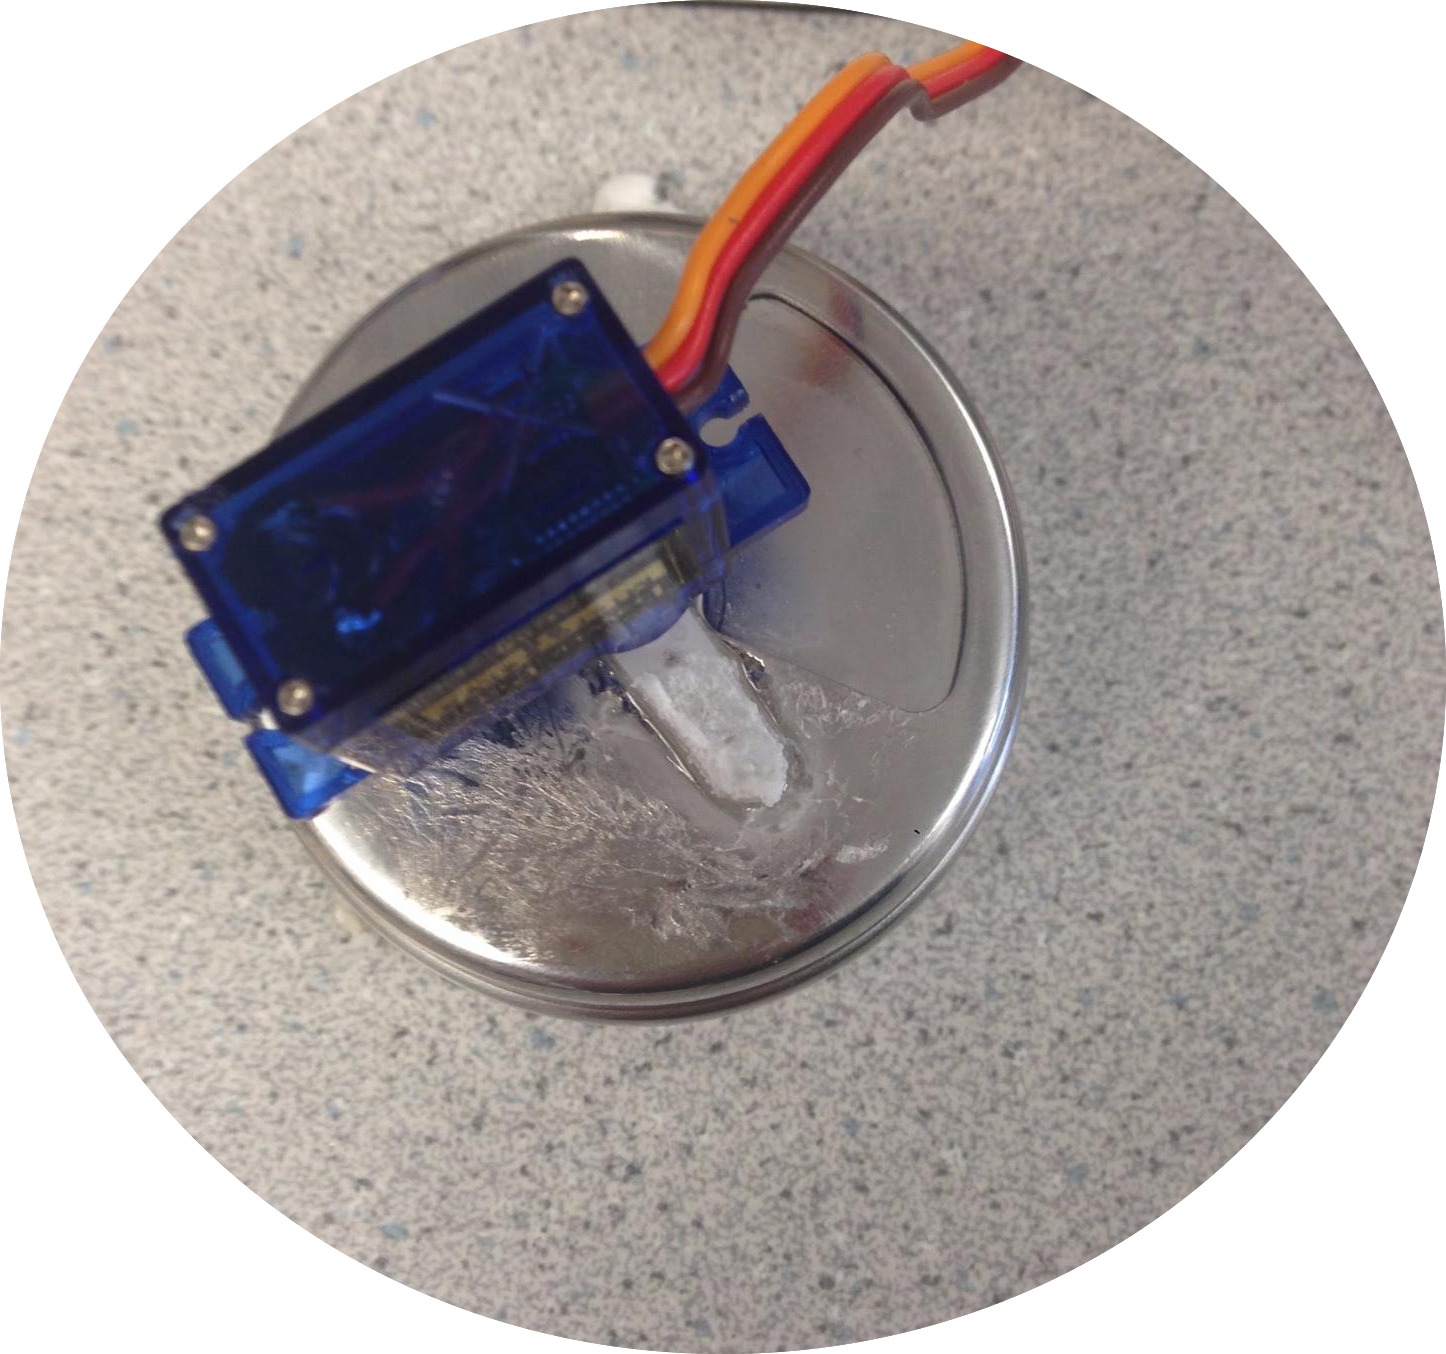
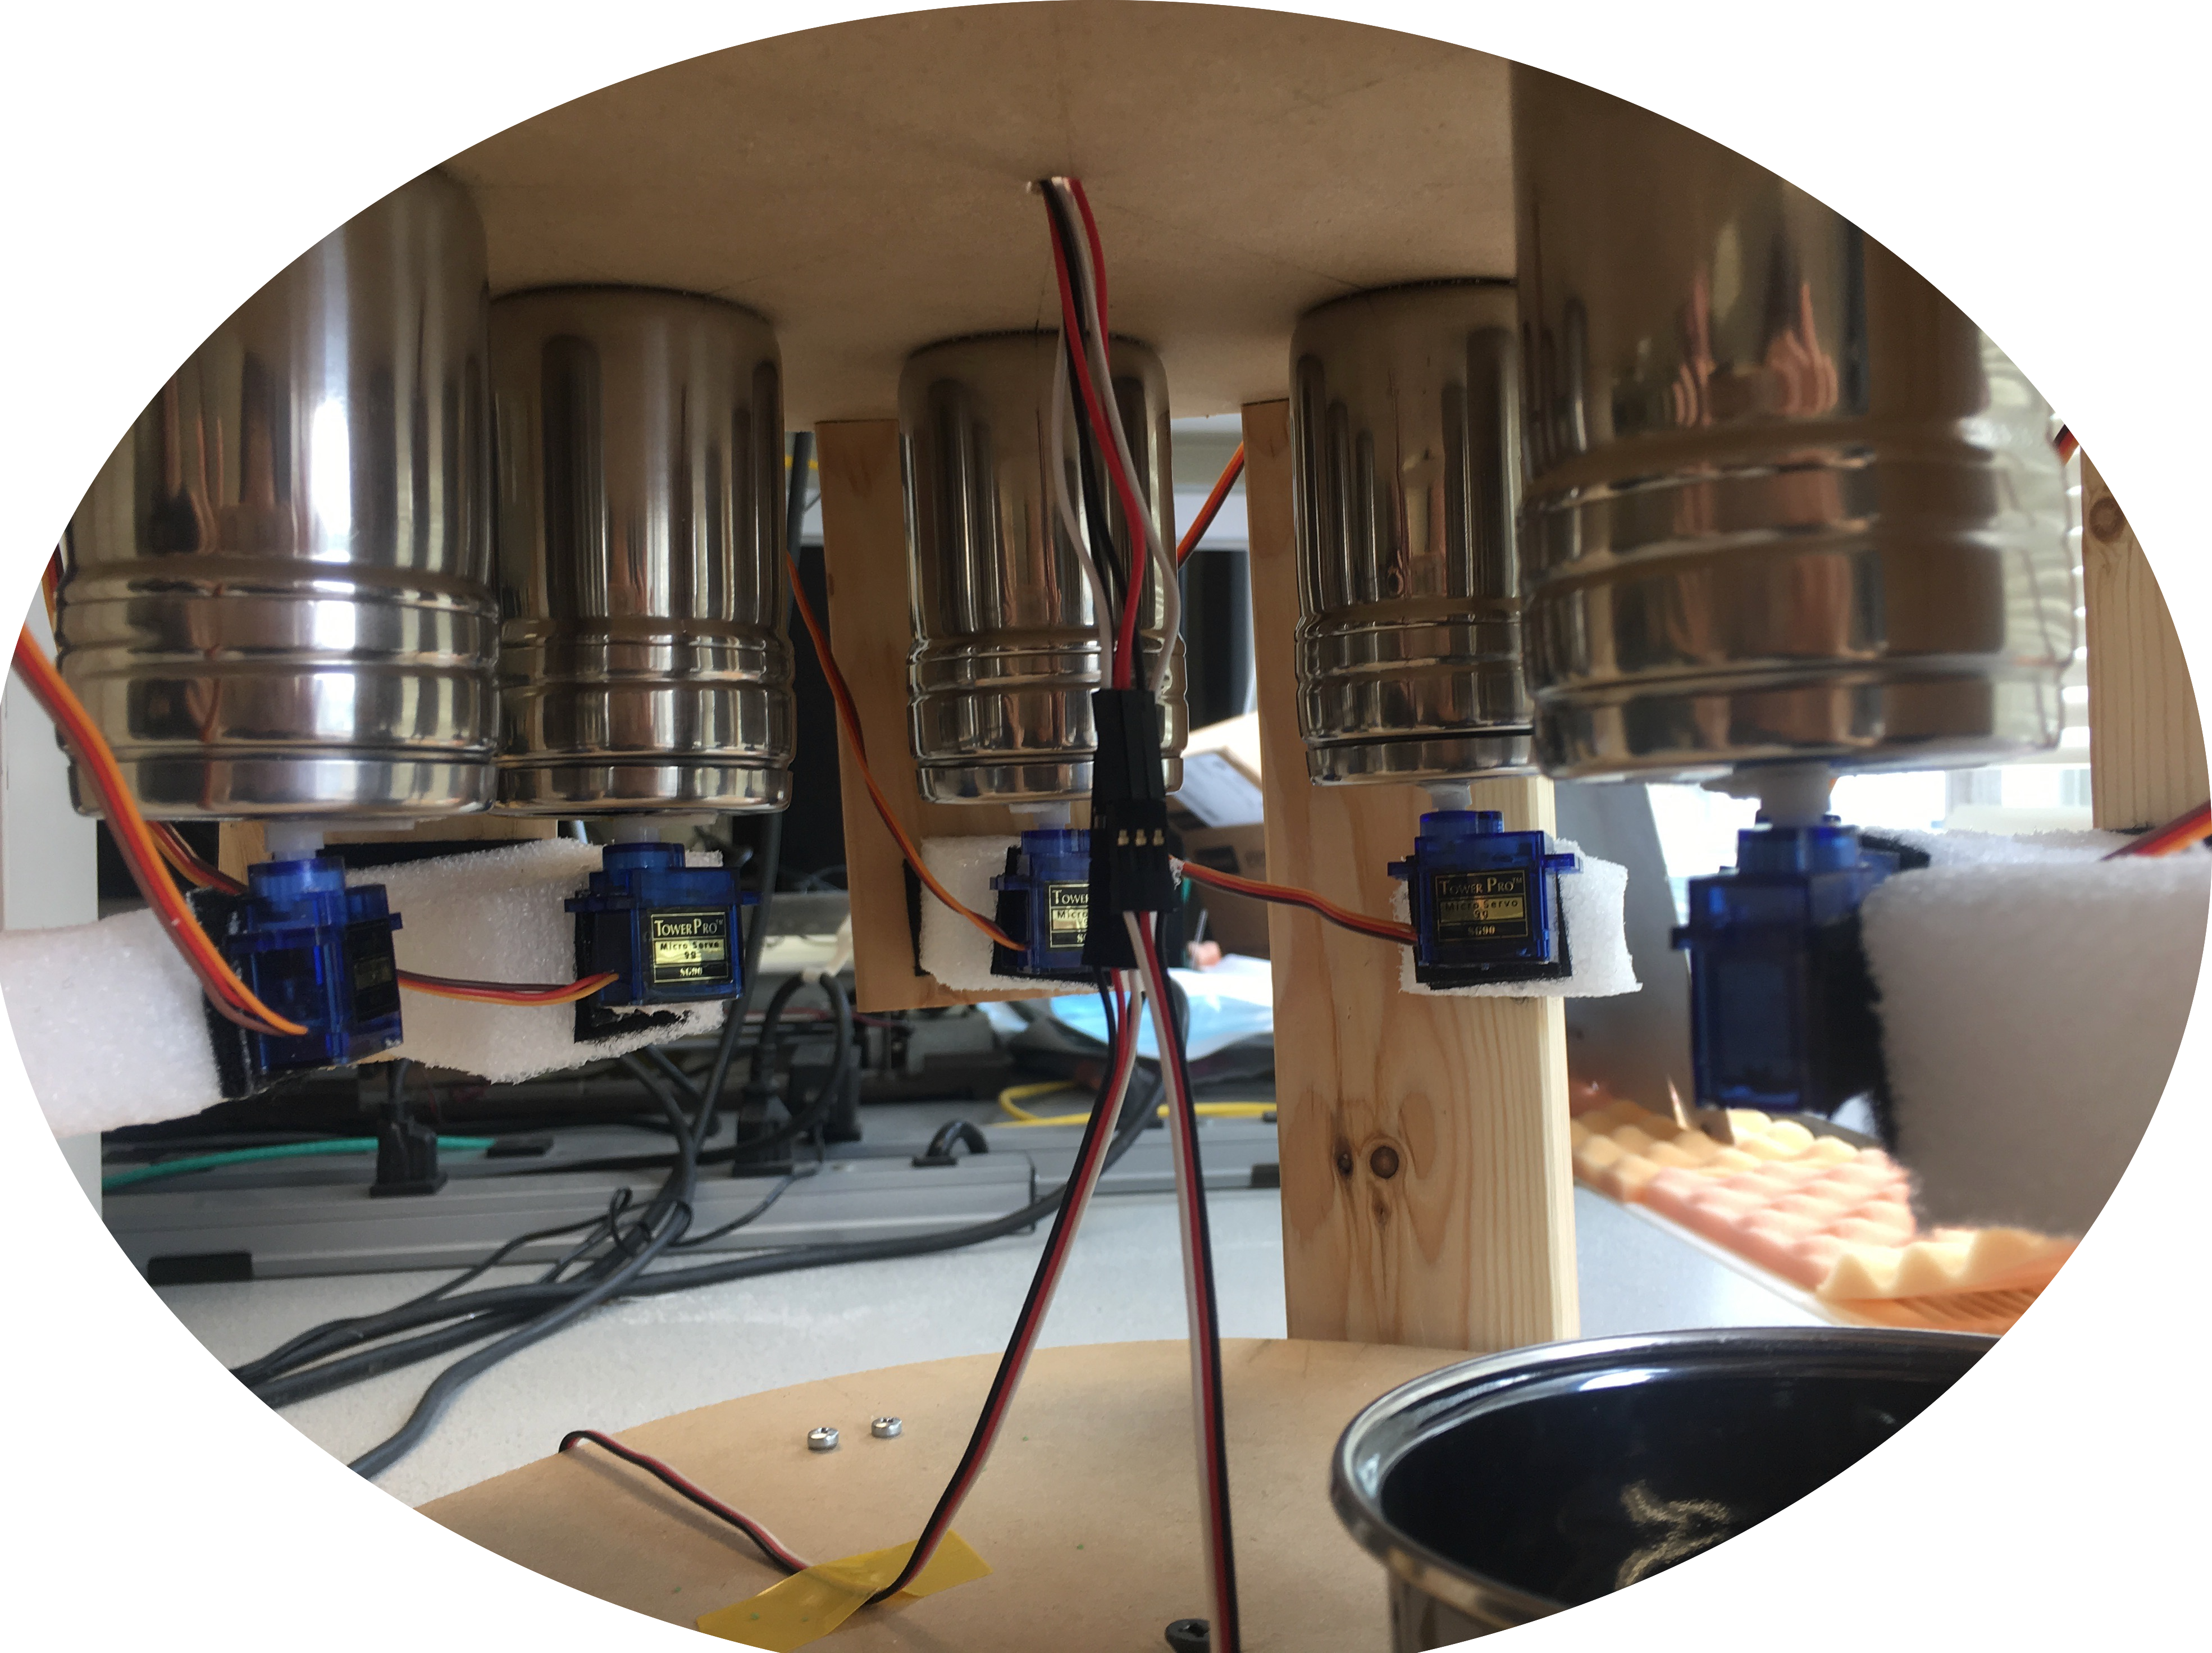
top DetailsDesign: In order to dispense steadily, we would like to come up with a way to rotate the shaker can cover reliably. Our final design, as shown in the figure below, uses the micro servo to control the rotating cover, as they are relatively easy to control and has a horn which can be attached to the rotating cover using superglue. To integrate the design into the framework, we added three more furring strips to the framework and secured the micro servos to the furring strips for effective rotation of the covers.
 |
 |
|---|
Testing:
We deployed a similar method to test the design of the can covers: first test each can individually and then test the integrated design. We realized two problems in the process:
1. The ingredient gets stuck in between the cover and the top part of the can due to the slightly loose attachment and the holes on the can.
2. When the servo first started, it jitters and rotates for a random degree if no signal was sent as an input. This rotation exposed the holes on the bottle, causing the ingredients to leak when not intended.
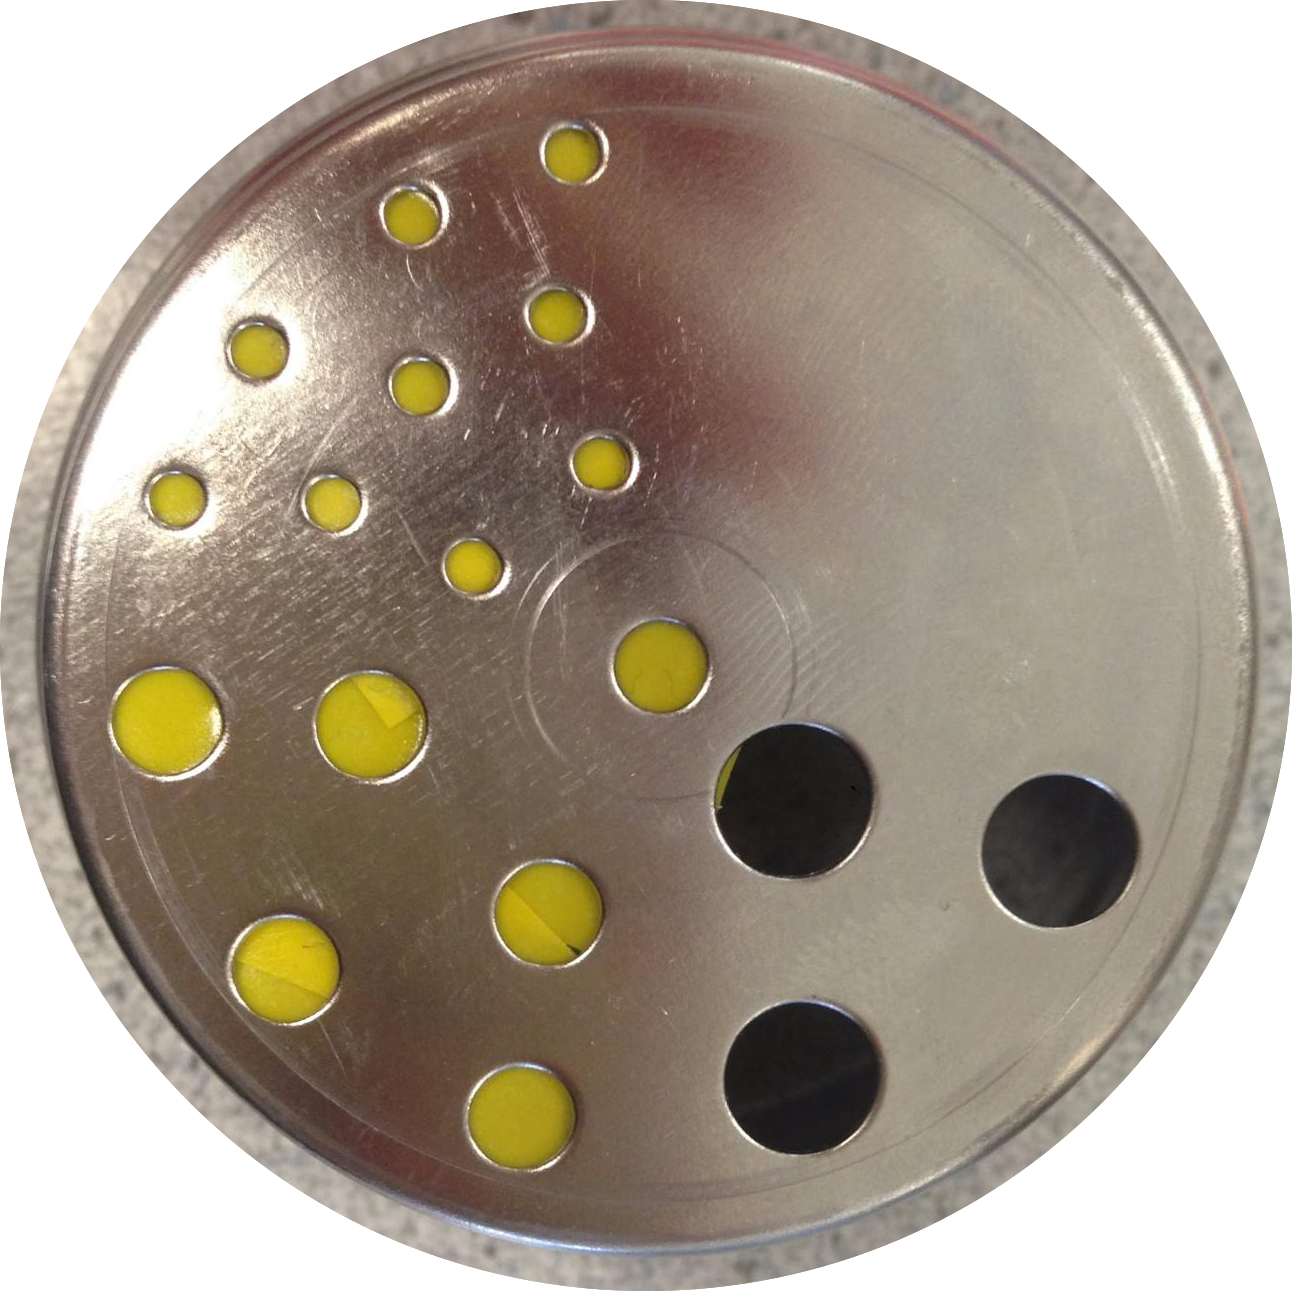 To solve the first problem, we used tape to cover most of the holes, which are not used for dispensing anyways, as shown in the figure on the side. This fix allows almost no ingredient to leak through the hole when the can is upside down.
To solve the second problem, we programmed the Raspberry Pi such that it gives a signal to push the servo to the extreme left position, which keeps pushing the cover to the same safe position. Since the cover is already at the safe position, when the power is applied, the cover stays fixed at its original point, preventing the ingredients from leaking.
Software User Interface
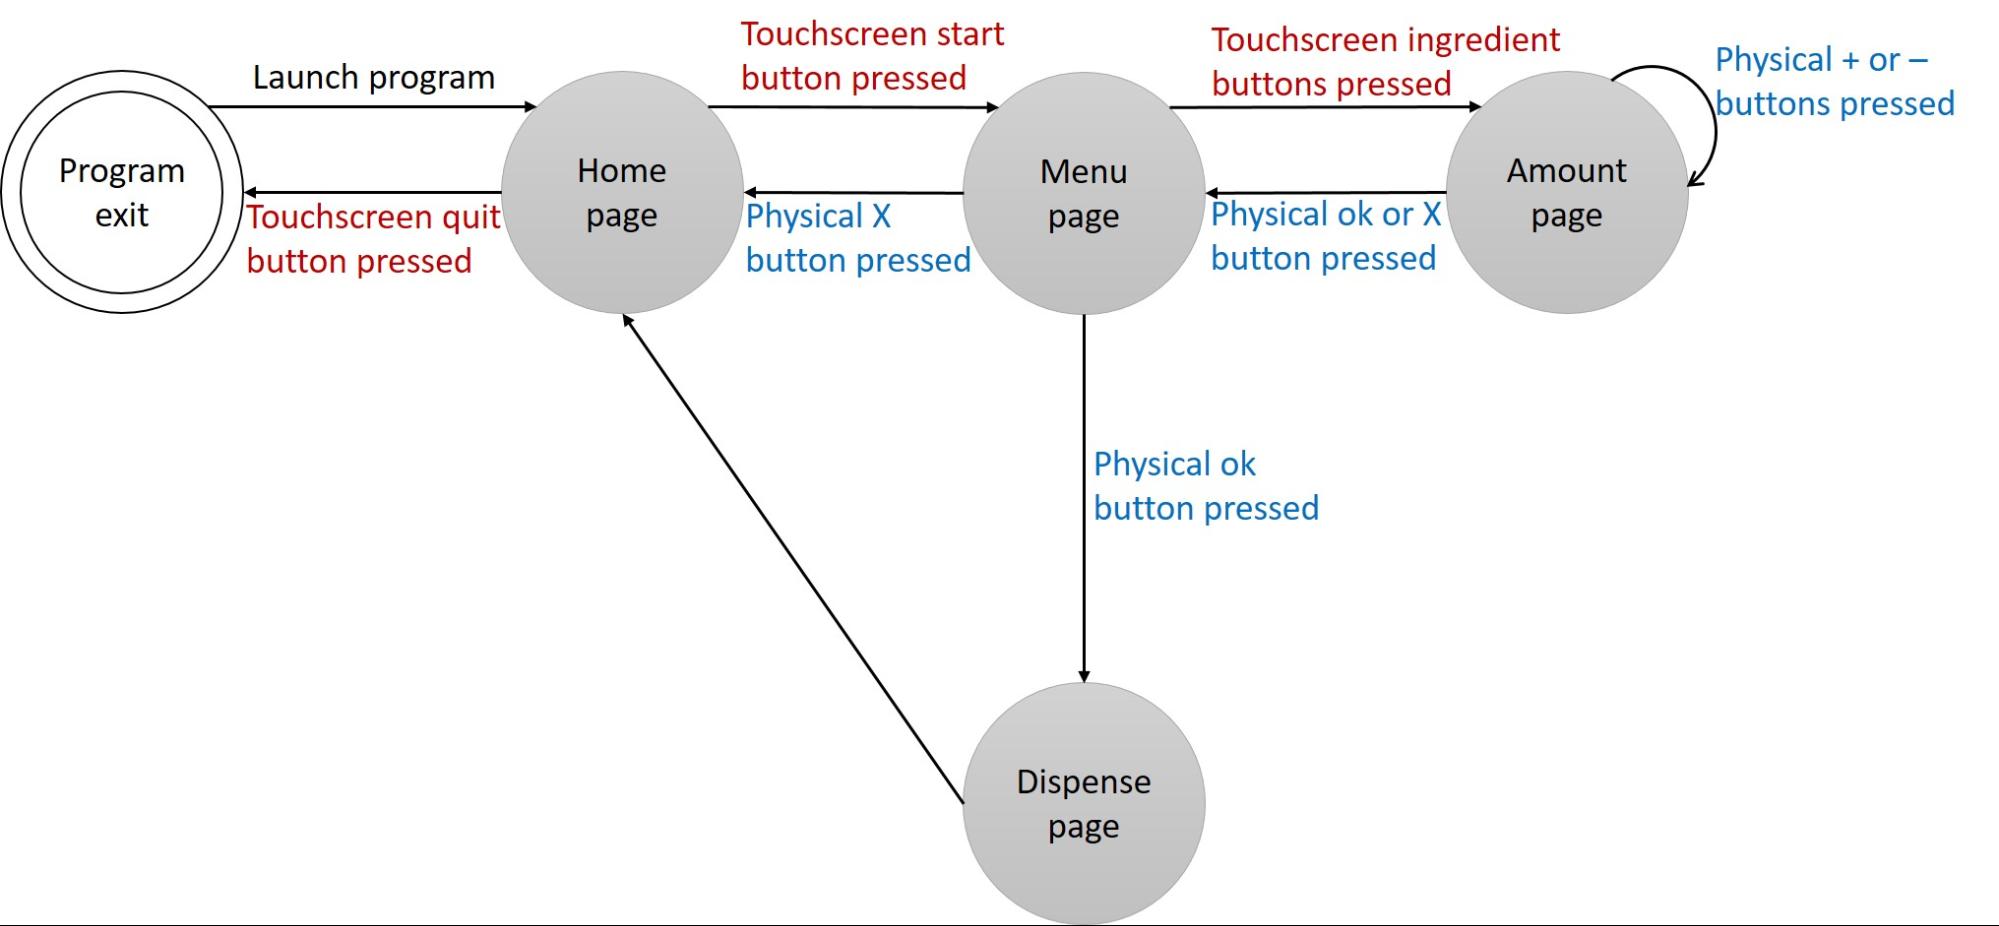
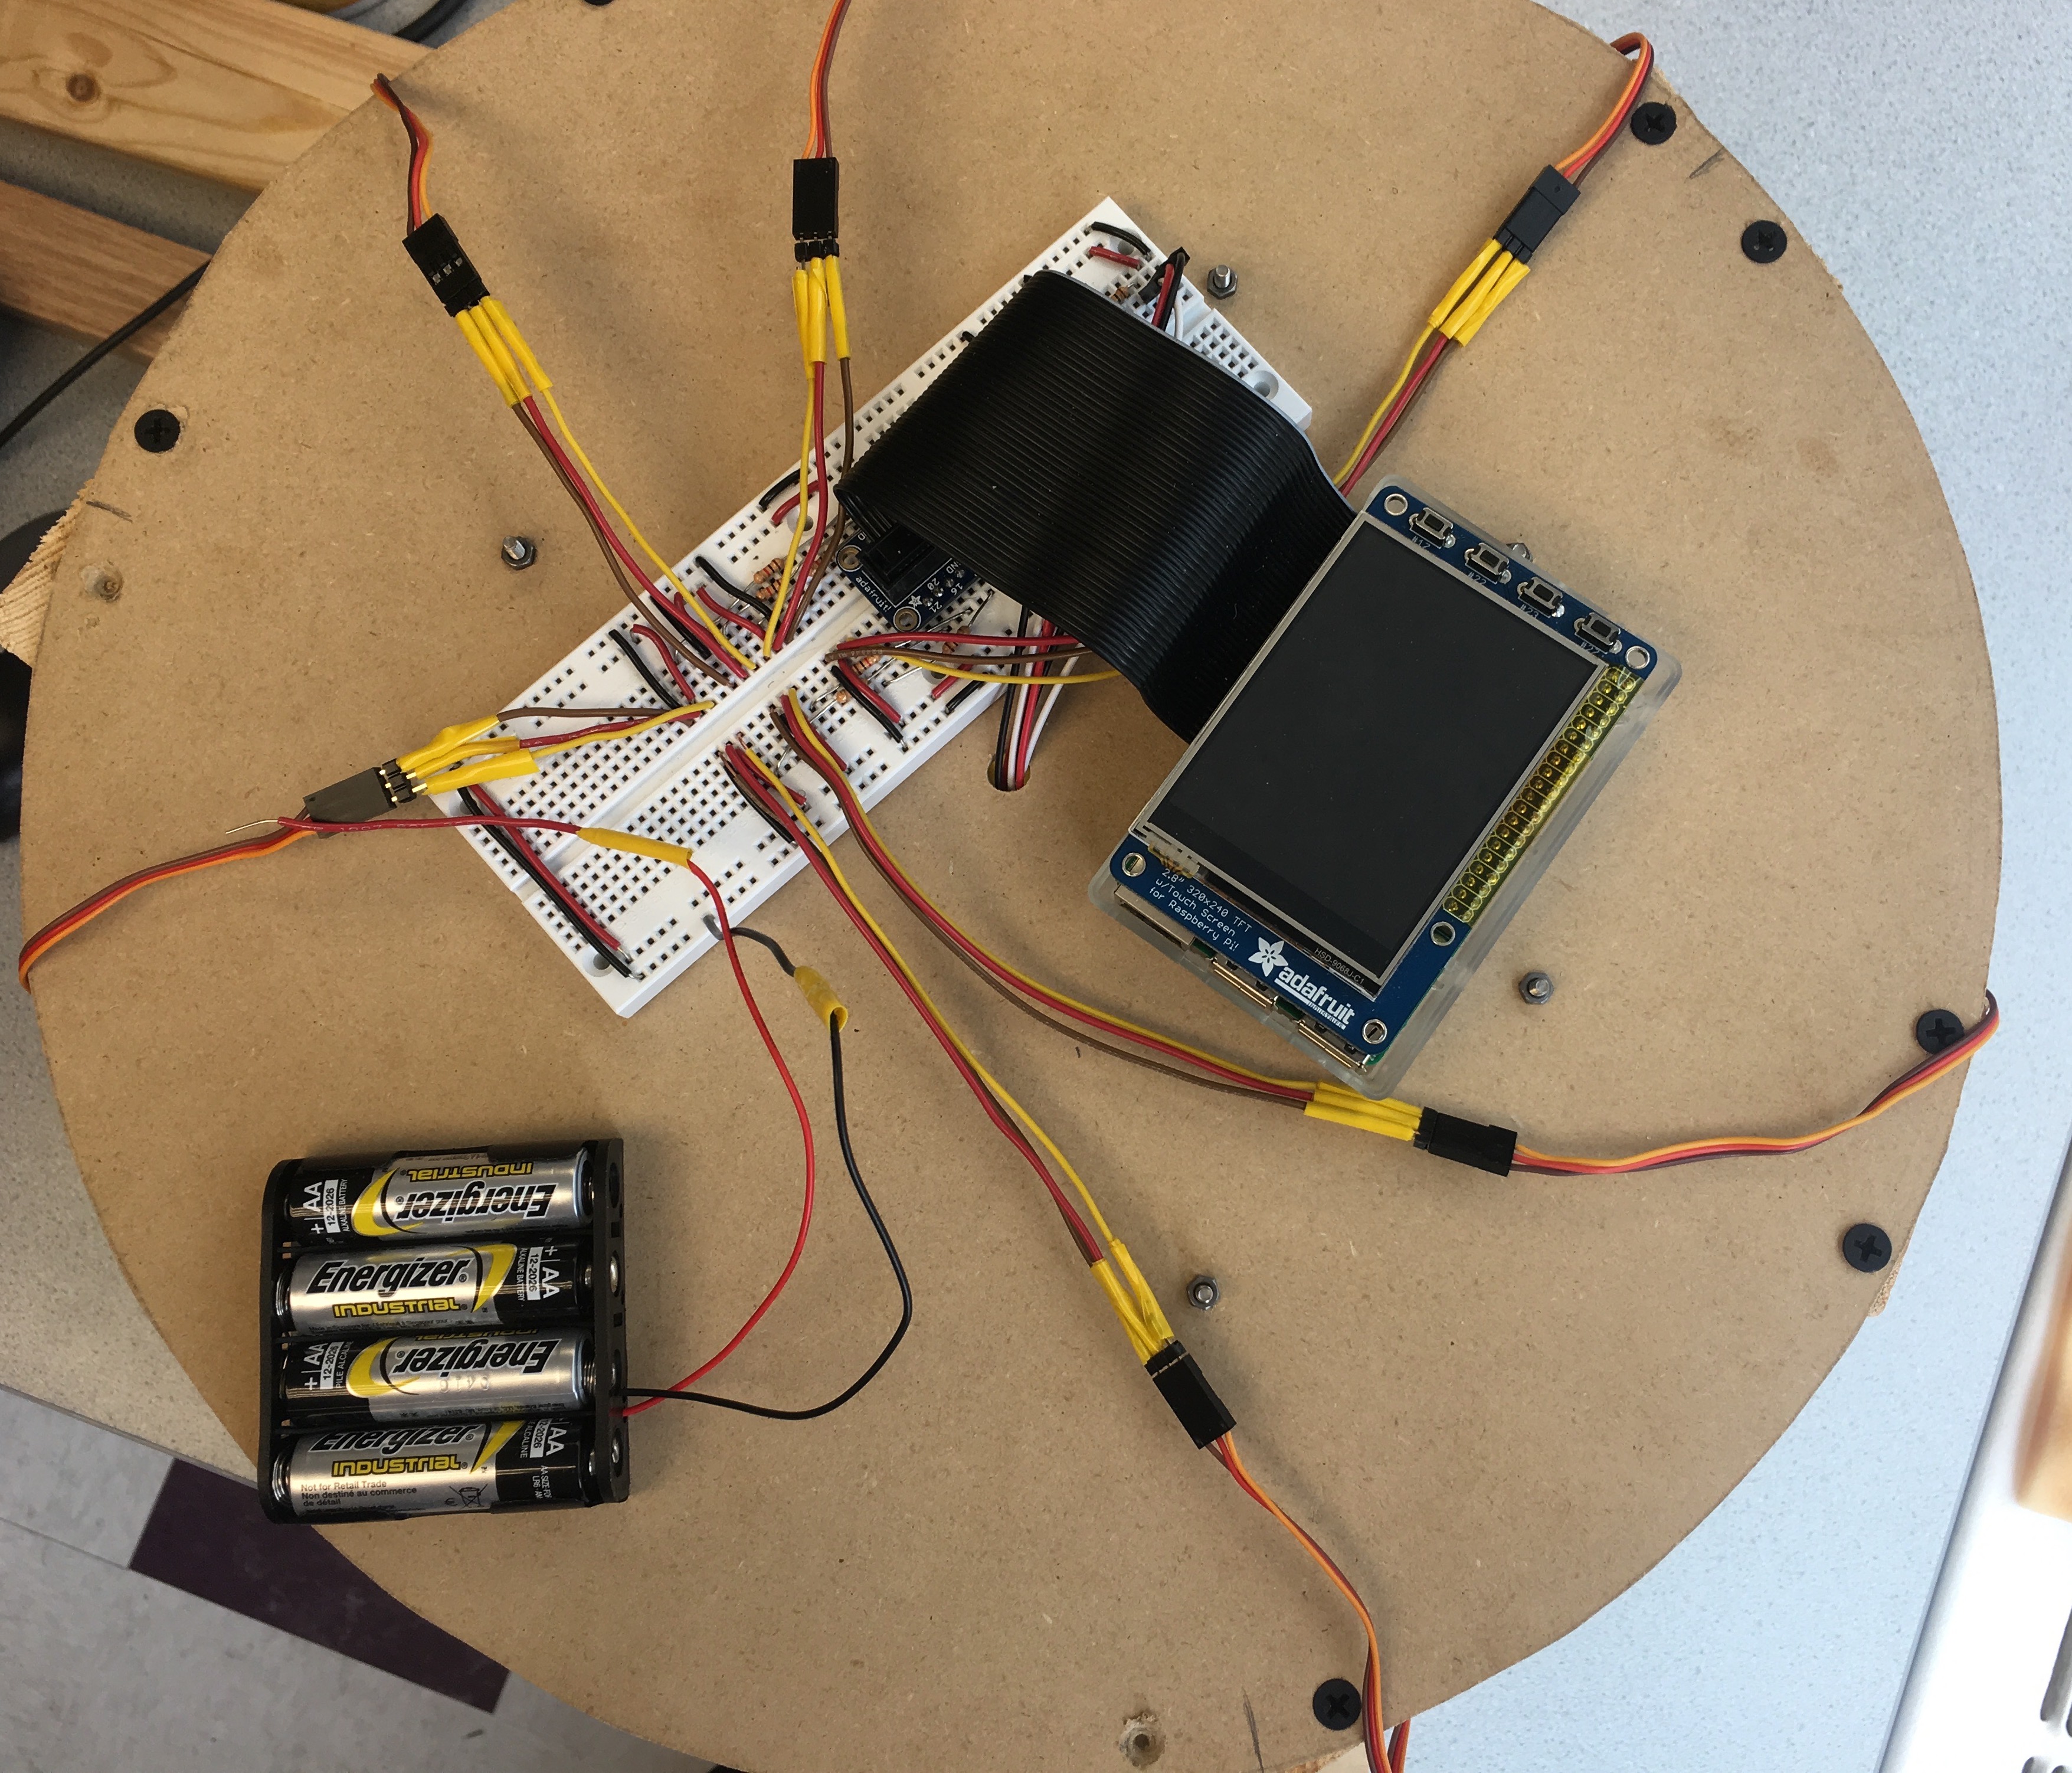
top DetailsDesign: For the software user interface, we wrote a python script that utilizes the pygame and the RPi.GPIO library. The pygame library serves the purpose of controlling the aesthetics of the interface as well as gathering user input via the touchscreen to transition the program between different states. The RPi.GPIO library is used to add event listeners and callback functions to detect the pressing of the physical buttons on the PiTFT to also transition the program between different states. The way we incorporated the touchscreen and physical button transitions can be seen in the figure below.
 |
|---|
Testing: To test the software design, we tested the touch sensitivity for all of the touch buttons, and tested the reaction time and effectiveness of the used physical buttons as well. We also tried various corner cases that could possibly affect how our robot behaves. We did the corner case test both incrementally for each subfunction, and for the entire program as a whole.
We also experimented with the various sleep times to ensure they are appropriately set so as to allow just the right time for dispensing the ingredients with little spillage.
Furthermore, during our testing process, we added a callback quit button that allows us to quit the program anytime in the event there is bug in the code that could potentially prevent us from returning to the home page where the touch screen quit button is located. This minimized the number of times we needed to unplug the Raspberry Pi.
Overall, the software component went fairly smoothly and we did not hit any major problems.
Wiring
top
Design: The wiring design for our project is not as complicated. The main concern for us was the fact that not all plates are rotating, i.e. the bowl holder plate is constantly rotating, but the other two plates are not. Therefore, we have to make sure that the wire will not tangle together after several rounds of rotation. We solved the problem in two ways:
1. We always rotate the bowl holder plate back to where it was after a round of dispensing, so that the wires for the continuous servos are also back to the original positions.
2. We drilled a hole in the middle of the top plate, and let the wires from the continuous servos go through the middle hole instead of wrapping around the whole frame. This allows much less tangling for the wires, since they need nearly no rotation when they are placed in the middle.
We wrapped the wires from the micro servos directly around the framework, as the cans are not moving, and there is no possibility for those wires to tangle.
 |
 |
|---|
Testing: The testing is fairly simple for the wiring design. We simply set it up, and tested whether the connections are robust and if there was any tangling. Fortunately, we did not find any problem with this wiring design.
Zhengning Han zh62@cornell.edu  Yannan Wu yw348@cornell.edu