Design and Testing
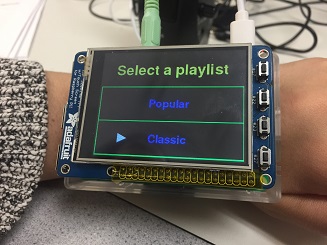
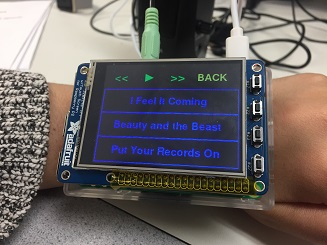
The PiMusic app features two pre-loaded playlists, each consisting of three songs, which can be controlled using a variety of on-screen buttons that perform actions such as "skip backward", "play/pause", and "skip forward." The key selling point of PiMusic is that the user can navigate to other app screens after beginning a song and playback will be maintained. The user may then return to the relevant PiMusic screen to issue further playback control commands using the appropriate touch presses. All audio is output via the headphone jack on the Raspberry Pi. The design and testing aspects involved with implementing PiMusic are described below.
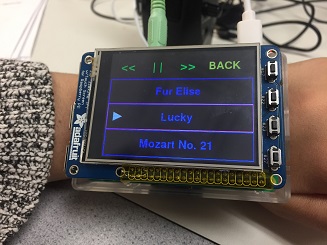
Design steps for this app consisted of using the appropriate PyGame functions to display the desired screen images, implementing and optimizing the touch input detection on the various buttons, as well as integrating everyhthing with FIFO-controlled mplayer instances. Modularity was maximized by having separate, contained functions for drawing to the screen and playback control. With respect to the PyGame display functions, we used a combination of the text-drawing, rectangle-drawing, and polygon-drawing capabilities. Text was used to identify songs, playlists, and playback control commands. Rectangles were used to separate and highlight the currently-playing song and playlist, with the current song/playlist both being outlined in magenta with an adjacent white "play symbol" triangle. A dedicated function was implemented to handle all display update aspects of PiMusic, using maintained variables for the current screen, current song, etc. For touch input detection, we implemented a dedicated function to check any press that occurs while in the PiMusic app. In terms of registering the initial detection of a full touch screen press, we use the Pygame event detect functions that return the position of a touch press, which we then pass in to our check function.
| Button (symbol or location) | Mplayer Command | Action |
|---|---|---|
| << | seek -30 0 | Skip backward 30 seconds |
| >> | seek 30 0 | Skip forward 30 seconds |
| || | pause | Pause/resume playback |
| Left side of current song title | volume -10 | Decrease volume |
| Right side of current song title | volume 10 | Increase volume |
In terms of the actual song playback, we use the mplayer media utility with the "-novideo" option to allow for the piTFT to continue displaying the PiWatch screen. Anytime a new song is selected, we create a new mplayer instance that is configured to receive all playback control commands from a FIFO. We then simply issue the appropriate commands (e.g., pause and skip forward/backward) upon detecting the various button presses in the PiMusic app, using the subprocess library in Python to issue command line actions from our main PiWatch program, specifically within the touch detect function. Additionally, we decided to have all songs play on "repeat" mode, which simply means that mplayer will restart the song once it has finished, until the mplayer instance is terminated. Termination of an old mplayer instance occurs whenever a new song is selected, such that only one mplayer instance (i.e., one song) is running at a given time. Furthermore, to make the PiMusic app even more user-friendly, we implement volume controls for the currently playing song as follows: pressing the song in the left or right portion of the screen decreases or increases the volume of playback, respectively. The specific mplayer command descriptions and syntax can be found in Table 1 .
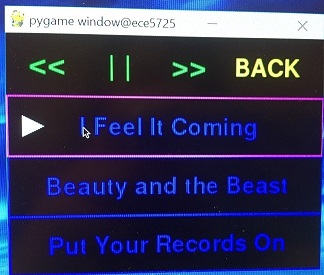
Testing for PiMusic consisted of multiple stages. First, all touch detection needed to be confirmed to be working as expected. This was done by temporarily setting the appropriate environment variables in order to run the app in a console on the startx Pi desktop. This allowed for precise clicks with the mouse to be observed in order to confirm functionality. An image from this process can be found in Figure 1 . We then proceeded to the next stage to ensure all song playback aspects were working as expected. This was done by connecting external speakers to the audio jack output of the Raspberry Pi in order to listen to the response behavior of each test action. During these tests, we only experienced minor issues that we were able to quickly resolve, namely incorrect song references (i.e., selecting one song incorrectly resulted in playback of another). After testing all functionality in desktop mode, we then set the appropriate environment variables needed to run the app on the piTFT screen. We then proceeded to re-verify all event detection, response, and audio playback behavior for the actual PiWatch setup. This completed the design and testing phase of the PiMusic app.